

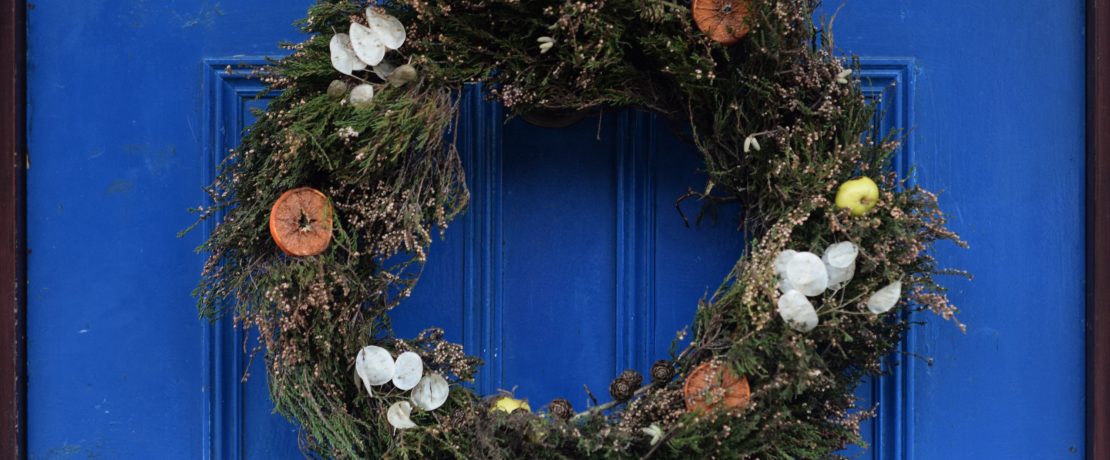
How to make a festive wreath

A decorative wreath can celebrate both the countryside and season. CPRE staff member Lucie Rymer explains how.
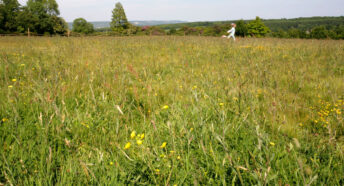
I love a forage. And one of the benefits of this landlocked year is that I have been able to spend more time than ever seeking and pocketing some of nature’s treats. For me, winter walks mean one thing – wreath foraging!
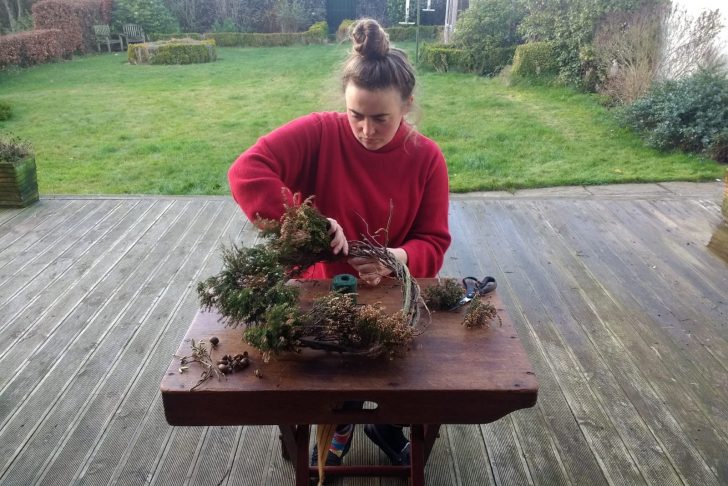
I’ve spent the past few months back on my dad’s farm where I grew up, in the landscape that created my first wreath. I was a bit worried about writing a ‘how-to’ on wreath-making as I tend to follow my nose on a lot of things. So if you are going to give this a go, my main piece of advice is just to fiddle about and get in a tangle. After all, wreaths are just lots of bits of twigs tangled into a pretty knot.
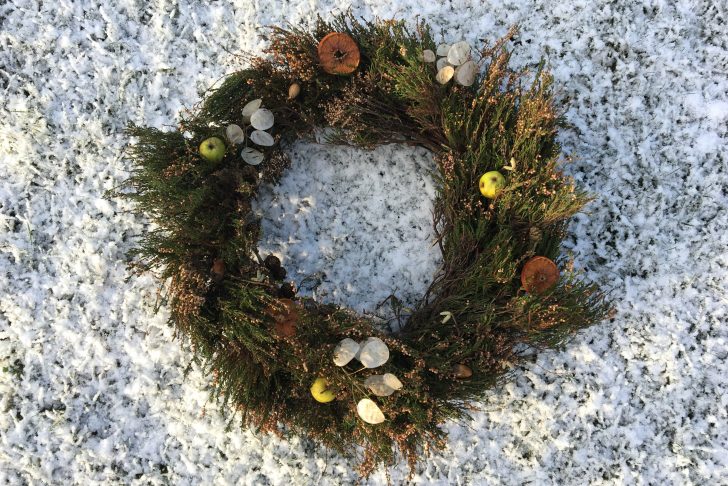
This time, however, I decided to challenge myself to make a compostable wreath, meaning no gold spray, no unnecessary wire that can’t easily be removed, and no glue – and I’m really pleased with the result.
Gather what you need
Tools
- Scissors
- Secateurs
- Twine that will compost
- Wire (not essential, but good for holding the nick-nacks in place)
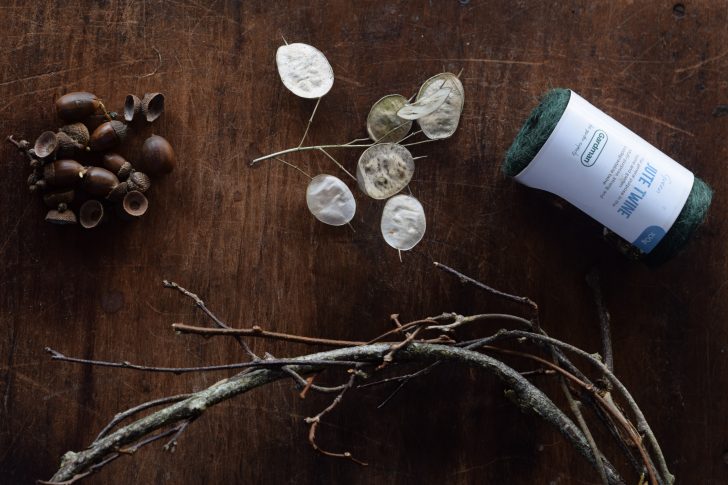
Foraged materials
- A bag of heather twigs
- Larch pinecones
- Catkins
- Acorns
- Crab apples
- Honesty seed pods
- Tangerine foraged from the fruit bowl (sliced and baked until dry)
- Large bendy twig (1.5–2 metres, about 2cm diameter max at the thickest end)
Step 1
Go for a walk with a bag and some secateurs. Find a nice bendy twig and anything you might like to put on your wreath. There’s a good chance you can find all you need on the ground, as it’s hedgerow and tree-pruning season, so do have a hunt about before you snip – and remember, the foraging rules are to take only a small amount, don’t uproot the plant, don’t trespass on private land and leave plenty of berries for wildlife. We have more tips about the kinds of lovely evergreens you might want to find and use in our article about winter holly, ivy and more.
In terms of foliage, I go for heather because it’s such a feature of the landscape near me and I love how wild it makes my wreath look. It does drop quite a lot of bobbles mind you, so probably not one for you if your house is spotless. Any twiggy green foliage will work though, so just go with what you can sensibly source.
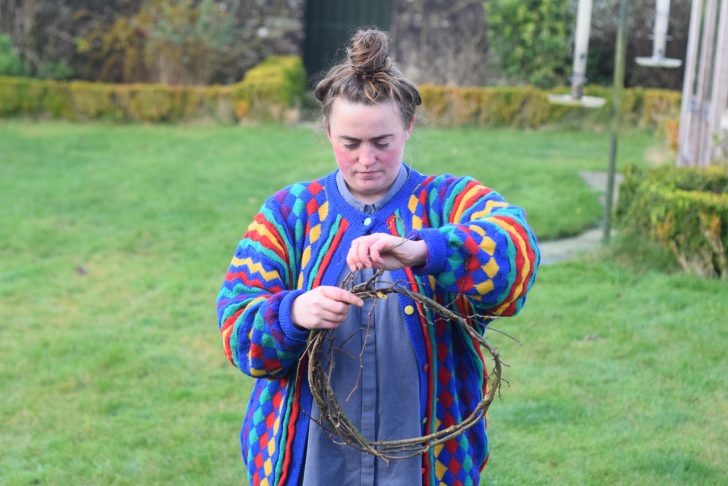
Step 2
Bend the large twig into a hoop shape, starting with the thickest part. Overlap and interweave the skinny end until you’re in a good tangle and have a good solid structure. I find it holds itself together really well, but you can always use some twine if you’re worried (remember to remove before composting if it’s the wrong sort of twine for the compost bin or heap).
If it snaps at any point, don’t worry, you can snap it a few inches along to help maintain the shape. If you’re making a special trip to forage the twig, I’d collect a couple of back-ups just in case.
Step 3
Take a handful of foliage and carefully but forcefully thread it in between the hoop, arranging it so that it fills a section on the hoop nicely. Repeat.
Top tip: You might find you get a bit cross with it, but do persevere, a little wiggle here and there will sort it right out. And don’t worry if it starts looking weird. If you stared at your face long enough I bet that would start to look weird too, and I’m sure you have a lovely face.
Step 4
Once your wreath is looking nice and full, secure the twine to the hoop with a tight knot and then tightly wind the twine around the stems and hoop to secure the foliage snugly in place. You can hide the twine under the leafy bits to keep it looking nice and tidy.
Once you’ve secured the whole wreath, give the twine a good tug to make sure it’s tight. Then tie it off, leaving a good five inches extra before you snip the twine. It might come in handy, particularly if you decide to secure the wreath a second time or to make a loop to hang the wreath up from.
Step 5
It’s time to get the foraged goodies out and start decorating. You can fix them into place either by weaving them into the tangle, tying them with string or twine, or using wire. Be sure to tie to the hoop itself for a sturdier fix. If using twine, secure with a tight knot, if using wire just twist until it holds tight.
If you’re aiming for a compostable wreath, but really pining for a splash of gold, just give the wreath a puff of edible cake glitter (found in most supermarkets) wherever you think it needs it. Or tie a few shiny bits onto the wreath and take them off before composting.
I sometimes attach silly bits from around the house, like plastic animals. I also like to bake tangerines and oranges which, with a little help from a fairy light, turn into tiny stained glass windows.
Step 6
Take a moment to decide which way you think your wreath sits best. Once you’ve made a decision, you can cut a five-inch length of twine, and thread that onto your wreath hoop, knot the ends together to make a loop. You will use this to hang your wreath.
Step 7
Hang your wreath. You can hang it in a number of ways, banging a nail into your door, hanging off a pre-existing feature on your door, or you can buy a wreath-hanging hook that sits over the top of your door.
Stand back and wait for the compliments to arrive!
Wreath care
You can mist the wreath every so often to keep it perky, though I don’t tend to bother. Crab apples, berries and rosehips wrinkle over time. You can either embrace the look or replace them every so often.